

Winter is just around the corner, which means it’s time to start thinking about preparing your garden for the colder months. While most people focus on protecting their plants, it’s important not to forget about your rusty garden tools. After a long season of use, it’s crucial to give them some attention and care to ensure they are in top condition for next year’s gardening.
In this blog post, we will discuss the importance of garden tools cleaning and provide you with some tips on how to properly clean your garden tools for winter. So, let’s get started on preparing your tools for the upcoming season of Clean Garden Tools For Winter.
Before we explain how to clean garden tools for winter, it is necessary, we talk about the importance of doing so as a gardener.
Table of Contents
Importance of cleaning garden tools for winter
As winter approaches, many gardeners may be focused on protecting their plants from the harsh elements. However, it’s equally important not to neglect your trusty garden tools during this time.
Cleaning your garden tools for winter is an essential step in ensuring their longevity and effectiveness. By taking the time to clean and care for your tools now, you’ll be saving yourself a headache and unnecessary expenses in the long run.
Cleaning your tools before storing them for winter serves several purposes.
Firstly, it removes any excess dirt and debris that may have accumulated during the gardening season. This helps prevent the buildup of rust, which can weaken the tools over time. Additionally, cleaning your tools helps to remove any plant pathogens or pests that may be lingering on the surfaces. By disinfecting them, you’re reducing the risk of spreading diseases to your plants in the next growing season.
Regular maintenance of your garden tools is key to keeping them in good condition. By following a simple cleaning routine before winter sets in, you’ll ensure that your tools are ready to go when spring arrives. In the next section, we’ll dive into the step-by-step process of cleaning your garden tools for winter.
8 steps for cleaning garden tools for winter
Step 1: Gather Your Tools
Before you begin the process of cleaning your garden tools for winter, the first step is to gather all the necessary tools. This ensures that you have everything you need within reach, making the cleaning process more efficient.
Start by collecting your basic cleaning supplies, such as a bucket or basin, a garden hose or pressure washer, a scrub brush or sponge, and a mild soap or detergent. You’ll also need a pair of gloves to protect your hands during the cleaning process.
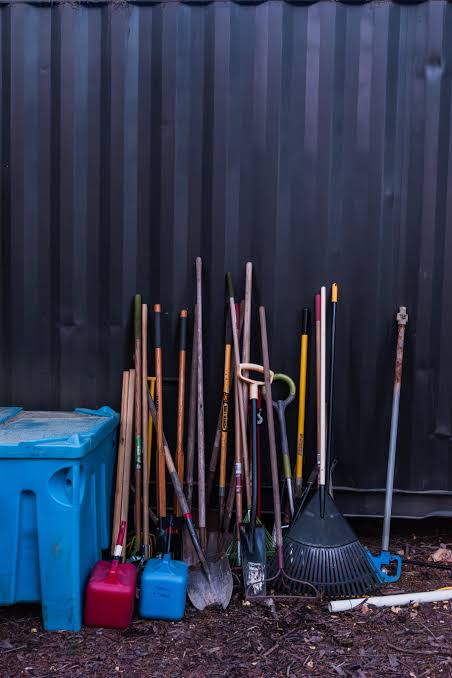
Next, gather all your garden tools in one place. This includes items such as shovels, rakes, hoes, shears, and any other tools you regularly use in your garden. Make sure to check all your tool storage areas, such as sheds, garages, or tool racks, to ensure you have retrieved all your tools.
Once you have gathered your tools, take a few minutes to inspect them for any visible damage or signs of wear. This will help you identify any tools that may need extra attention or repair before the cleaning process.
By gathering all your tools and supplies in one place, you’ll be ready to tackle the cleaning process smoothly and efficiently. So let’s move on to the next step and get those tools clean and ready for winter!
Step 2: Remove Excess Dirt and Debris
Once you have gathered all your tools and supplies, it’s time to tackle the next step in cleaning your garden tools for winter: removing excess dirt and debris. This is an important step because it not only helps to prevent rust and corrosion, but it also ensures that your tools are ready for use when spring rolls around.
To begin, take a moment to inspect each tool and brush off any loose dirt or debris. You can use a stiff brush or a cloth to gently remove the dirt. For tools with caked-on dirt or stubborn debris, you may need to use a hose or pressure washer to rinse them off. Just be sure to use a low setting to avoid damaging the tools.
As you’re cleaning, pay close attention to hard-to-reach areas, such as crevices or tight spaces. These areas are often prone to buildup and can harbor moisture, leading to rust. Use a small brush or toothbrush to get into these nooks and crannies and ensure they are free from dirt.
Once you have removed the excess dirt and debris, give your tools a final rinse with water and allow them to dry thoroughly before moving on to the next step. This will help prevent any residual moisture from causing damage or rust during storage.
By taking the time to remove excess dirt and debris from your garden tools, you’re setting yourself up for success in the next gardening season. So roll up your sleeves, grab a brush, and get those tools sparkling clean!
Step 3: Wash with Mild Soap
Once you have removed the excess dirt and debris from your garden tools, it’s time to give them a good wash with mild soap.
This step is important for removing any remaining grime and sanitizing the tools before storing them for the winter.
To begin, fill a bucket or basin with warm water and add a small amount of mild soap. Avoid using harsh chemicals or abrasive cleaners, as they can damage the tools. Gently agitate the water to create a soapy solution.
Next, take each tool and submerge it in the soapy water. Use a scrub brush or sponge to scrub away any stubborn dirt or residue. Pay close attention to the blades or cutting surfaces, as these areas can harbor bacteria and pathogens.
After scrubbing each tool, rinse them thoroughly with clean water to remove any soap residue. Make sure to rinse off all the soap to prevent any chemical buildup. You can use a hose or a bucket of clean water for rinsing.
Once the tools are rinsed, pat them dry with a towel or allow them to air dry completely. It’s important to ensure that no moisture is left on the tools, as this can lead to rust and corrosion.
By washing your garden tools with mild soap, you are not only removing dirt and grime, but also disinfecting them. This will help prevent the spread of diseases and pests in the next gardening season.
So, take the time to give your tools a good wash, and they’ll be ready to assist you in the garden when spring arrives!
Step 4: Disinfect the Tools
After removing the excess dirt and debris from your garden tools, it’s time to take the extra step of disinfecting them. This is especially important for preventing the spread of diseases and pests to your plants in the next gardening season.
To disinfect your tools, you can use a solution of 1 part bleach to 9 parts water. Simply fill a bucket or basin with the solution and soak your tools for about 10 minutes. This will kill any lingering bacteria, fungi, or pests that may be present on the surfaces.
After the tools have soaked, remove them from the solution and rinse them thoroughly with clean water. Make sure to remove all traces of the bleach solution to avoid any damage to your tools or plants. Then, allow the tools to air dry completely before moving on to the next step.
By disinfecting your garden tools, you’re taking an important step in maintaining a healthy and productive garden. So don’t forget to give your tools a thorough disinfection before storing them for the winter!
Step 5: Inspect for Damage
Once you have completed the cleaning and washing process for your garden tools, it’s time to move on to step five: inspecting for damage. This is a crucial step in ensuring that your tools are in top condition and ready for use when spring rolls around.
Start by closely examining each tool for any signs of wear or damage. Look for things like cracks in the handles, loose screws or bolts, and dull or bent blades. Pay special attention to cutting tools such as shears or pruners, as they may need sharpening or replacing if they are worn down.
If you come across any damaged tools, it’s important to address them before storing them for the winter. For small repairs, such as tightening screws or replacing handles, you can easily do it yourself. However, for more complex repairs or sharpening, it may be best to consult a professional.
Taking the time to inspect and repair any damaged tools will not only prolong their lifespan but also ensure that they function properly when you need them next year. So don’t skip this step and give your tools the attention they deserve!
Step 6: Dry the Tools
Now that you’ve completed the cleaning and washing process for your garden tools, it’s time to move on to step six: drying them. This step is crucial to prevent any residual moisture from causing rust or corrosion during storage.
After rinsing off the soap or disinfectant, use a clean towel to dry each tool thoroughly. Pay special attention to any nooks and crannies where moisture may have accumulated. It’s important to ensure that all surfaces, including the handles and blades, are completely dry before moving on to the next step.
If you prefer, you can also allow your tools to air dry. Simply find a dry and well-ventilated area, such as a garage or shed, and leave them there until they are completely dry. This may take a few hours or overnight, depending on the humidity level.
Remember, moisture is the enemy when it comes to tool maintenance. So take the extra time to ensure that your tools are completely dry before proceeding. By doing so, you’ll be one step closer to having perfectly clean and well-maintained garden tools for the upcoming winter season.
Step 7: Apply Lubricant
Now that you’ve gone through the process of cleaning your garden tools, it’s time for step seven: applying lubricant. Lubricating your tools is an important step in their maintenance because it helps prevent rust and corrosion while keeping them in smooth working condition. By applying lubricant to your tools, you’ll ensure that they are ready to perform at their best when spring arrives.
To apply lubricant, start by choosing the right type for your tools. There are several options available, such as oil-based lubricants or silicone sprays. Check the manufacturer’s recommendations for the best type of lubricant for your specific tools.
Once you have the appropriate lubricant, apply it to all moving parts of your tools. This includes joints, hinges, and blades. Be sure to coat the surfaces evenly and thoroughly. A little goes a long way, so you don’t need to overdo it.
After applying the lubricant, take a moment to work it into the surfaces. Move the parts of your tools back and forth to distribute the lubricant evenly. This will ensure that all the areas that need lubrication are properly covered.
By taking the time to apply lubricant to your garden tools, you’re investing in their longevity and performance. So don’t skip this step and give your tools the TLC they deserve.
Step 8: Store Properly
After you’ve gone through the process of cleaning and caring for your garden tools, the final step is to store them properly for the winter. Storing your tools correctly will help prevent damage and keep them in good condition until you need them again in the spring.
First, find a dry and well-ventilated storage area for your tools. It’s important to avoid damp or humid spaces, as they can promote rust and corrosion. A shed, garage, or tool rack with good airflow is ideal.
Next, organize your tools in a way that prevents them from banging or rubbing against each other. You can use hooks, pegboards, or hanging brackets to keep them separated and easily accessible. This will also help to prevent any sharp blades from accidentally injuring you or others.
Consider using tool storage solutions such as toolboxes or tool belts for smaller handheld tools. These will help keep everything organized and protect the tools from any external damage.
Lastly, make sure your tools are securely stored and protected from any potential damage. If you’re concerned about rust, you can apply a light coating of oil to the metal parts. This will create a barrier and help prevent moisture from causing rust.
By storing your garden tools properly, you’ll be setting yourself up for success in the next gardening season. You’ll save yourself time and money by ensuring your tools are in top condition and ready to use when spring arrives. So take the extra time to store them correctly, and you’ll be grateful you did!


