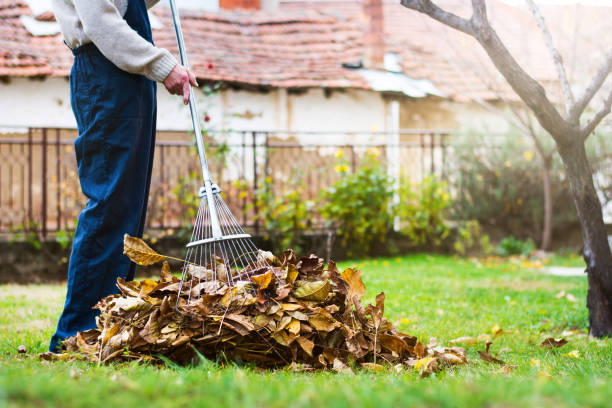
Gardening is a beloved hobby for many, but it can quickly turn frustrating when tools start to break or wear out. One common tool that often needs replacing is the garden rake handle. Whether it’s due to constant use, exposure to harsh weather conditions, or accidental damage, a broken or worn-out handle can make raking a difficult and uncomfortable task.
Fortunately, replacing a garden rake handle is a simple and cost-effective solution that can extend the life of your trusty gardening tool. In this blog post, we’ll guide you through the steps of how to replace a garden rake handle and get you back to enjoying your time in the garden.
Table of Contents
When to Replace Your Garden Rake Handle?
If your garden rake handle is cracked or broken, it’s definitely time to invest in a new one. A broken handle not only makes raking difficult, but it can also be dangerous if it splinters or causes you to lose control of the rake. Don’t take any chances – replace that broken handle!
Another sign that it’s time for a new rake handle is if the current handle is noticeably worn down or splintered. Over time, constant use and exposure to the elements can take a toll on your rake handle, causing it to become weak and less effective. If you find yourself struggling to get the job done because of a worn-out handle, it’s time to make a change.

Additionally, if you notice that your garden rake handle has become loose or unstable, it’s a clear indication that it’s time for a replacement. A loose handle can make raking feel unpredictable and can lead to discomfort or even injury. Don’t risk it, invest in a new handle that will provide stability and control.
Lastly, if you’ve had your garden rake for a long time and can’t remember the last time you replaced the handle, it’s probably a good idea to consider getting a new one. Over time, even the most durable handles can become worn and less effective.
Tools and Materials Required for Replacement
When it comes to replacing your garden rake handle, you’ll need a few essential tools and materials to get the job done right. Here’s a list of what you’ll need:
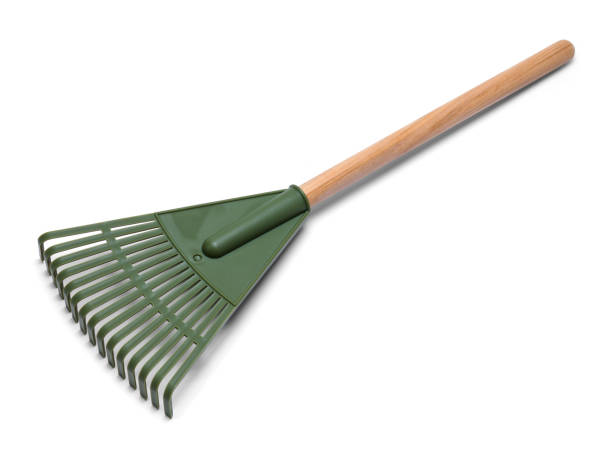
1. New Rake Handle: The most important item on your list is, of course, the replacement rake handle itself. Make sure you choose a handle that is compatible with your specific rake. Look for a handle made of durable material, such as hardwood or fiberglass, that will withstand the rigors of regular use.
2. Measuring Tape: Before purchasing a new handle, it’s essential to measure the length and diameter of your existing handle. This will ensure that you choose a replacement handle that fits your rake perfectly.
3. Saw: To remove the old handle, you’ll need a saw. A handheld hacksaw or a reciprocating saw will work well for this task. Make sure the saw is sharp and in good condition for efficient cutting.
4. Sandpaper: After removing the old handle, you may need to sand down the area where the handle was attached to ensure a smooth and even surface. Sandpaper with a medium grit, around 120 to 150, will be suitable for this task.
5. Wood Glue or Epoxy Resin: Depending on the type of handle you choose, you may need either wood glue or epoxy resin to secure the new handle to the rake head. Wood glue is suitable for wooden handles, while epoxy resin is more appropriate for fiberglass or metal handles. Follow the instructions on the product packaging for proper application.
6. Clamps: To hold the new handle securely in place while the glue or epoxy sets, you’ll need clamps. Choose clamps that are strong enough to provide sufficient pressure to keep the handle in place but gentle enough not to damage the handle or rake head.
With these tools and materials on hand, you’ll be well-prepared to replace your garden rake handle.
How to Replace a Garden Rake Handle in 10 Steps
Removing the Old Rake Handle
STEP 1. Ensure your safety: Before you begin, it’s important to prioritize your safety. Put on a pair of work gloves to protect your hands from any potential splinters or sharp edges.
STEP 2. Assess the current handle: Take a close look at the old handle and identify any screws, bolts, or other fasteners that may be securing it to the rake head. Use a screwdriver or wrench to remove these fasteners and set them aside for later use.
STEP 3. Prepare for cutting: If your rake handle is made of wood, you may need to trim off any excess length before removing it completely. Measure the desired length for your new handle, and use a measuring tape to mark it on the old handle. Then, using a saw, carefully cut off the excess length. Be sure to follow the marked line for a clean cut.
STEP 4. Remove the old handle: With the excess length trimmed, it’s time to remove the old handle from the rake head. Hold the rake head securely in one hand while gripping the handle with the other. Apply steady pressure as you twist and pull the handle away from the rake head. If the handle is stubborn or stuck, you can use a rubber mallet to gently tap the handle free.
STEP 5. Clean and prepare the rake head: Once the old handle is removed, take a moment to clean any debris or dirt from the rake head. A brush or damp cloth can help you remove any stubborn grime. Additionally, inspect the rake head for any damage or wear that may need attention before installing the new handle.
Installing the New Garden Rake Handle

Now that you’ve removed the old rake handle, it’s time to install the new one and bring new life to your garden tool. Follow these steps to install the new garden rake handle with ease:
STEP 6. Choose the right handle: Ensure that the replacement handle you purchased is compatible with your rake. It should have the same length and diameter as the old handle to ensure a proper fit.
Step 7. Apply wood glue or epoxy resin: Depending on the material of your new handle, apply a suitable adhesive to the end of the handle that will be inserted into the rake head. If you have a wooden handle, wood glue will work well. If you have a fiberglass or metal handle, epoxy resin is more appropriate. Follow the instructions on the product packaging for proper application.
STEP 8. Insert the new handle: Gently insert the adhesive-coated end of the handle into the opening in the rake head. Ensure that it fits snugly and securely. If necessary, you can tap the end of the handle with a rubber mallet to help it slide into place.
STEP 9. Secure with clamps: Use clamps to hold the new handle in place while the adhesive dries. Position the clamps at a suitable distance from the rake head to provide sufficient pressure. Be careful not to tighten the clamps too much, as this could damage the handle or rake head.
STEP 10. Allow time for drying: Follow the instructions on the adhesive packaging for the recommended drying time. It is essential to give the adhesive enough time to fully set and bond the handle to the rake head.
Once the adhesive is completely dry, your new garden rake handle will be ready for use. Remove the clamps and give the handle a gentle tug to ensure it is securely attached. If everything feels sturdy, you’re good to go!
Remember to maintain your garden rake handle regularly by cleaning it after each use and storing it in a dry place. Inspect the handle periodically for any signs of wear or damage and address them promptly. With proper care, your garden rake handle can last for years, ensuring that you can continue to enjoy your gardening adventures without any unnecessary frustration.
With your new garden rake handle installed, it’s time to get back out into the garden and make those leaves and debris disappear. Happy raking!
How to maintain your garden rake handle
Now that you’ve successfully replaced your garden rake handle, ir is time to learn how to maintain your garden rake handle.
Firstly, take a moment to give your rake a thorough inspection. Check that the handle is securely attached to the rake head and give it a gentle tug to test its stability. If you feel any wobbling or movement, tighten the clamps or reapply adhesive if necessary. It’s better to catch any issues now rather than have to go through the whole replacement process again later.
Next, it’s important to clean your rake handle after each use. Use a brush or damp cloth to remove any dirt, debris, or plant matter that may have accumulated on the handle. Not only will this keep your handle looking clean and shiny, but it will also prevent any buildup that could potentially weaken the handle over time.
When it comes to storage, it’s best to keep your garden rake handle in a dry and sheltered area, such as a shed or garage. Exposure to moisture and extreme temperatures can cause the handle to warp or deteriorate. If you don’t have a suitable storage space, consider investing in a cover or bag specifically designed for garden tools to protect them from the elements.
Lastly, don’t forget to periodically inspect your rake handle for signs of wear or damage. Regularly check for splinters, cracks, or any other issues that could compromise the integrity of the handle. If you notice any problems, address them promptly to prevent further damage or potential injuries.
By following these steps and implementing proper maintenance, you can extend the life of your garden rake handle and continue to enjoy smooth and efficient raking for years to come.


